Monday, December 21, 2009

Dynamically create and loop through MovieClip instances

Task: You need to dynamically create and then loop through MovieClips.
Solution: Use DisplayList and DisplayListContainer container methods.

var container:MovieClip = new MovieClip();
addChild(container);
var numItems:Number = 250;
var stageWidth:Number = stage.stageWidth;
var stageHeight:Number = stage.stageHeight;
function initClips():void
{
var c:MovieClip;
for(var i:Number = 0; i <>
{
c = new circle_mc();
randomizeClip(c);
container.addChild(c);
}
}
function randomizeClip(clip:MovieClip):void
{
clip.x = Math.random() * stageWidth;
clip.y = Math.random() * stageHeight;
clip.scaleX = Math.random() * 2;
clip.scaleY = Math.random() * 2;
var c:ColorTransform = new ColorTransform();
c.color = (Math.random() * 0xFFFFFF);
clip.transform.colorTransform = c;
clip.alpha = Math.random();
}
function onEnterFrame(event:Event):void
{
var c:MovieClip;
for(var i:Number = 0; i <>)
{
c = MovieClip(container.getChildAt(i));
randomizeClip(c);
}
}
initClips();
addEventListener(Event.ENTER_FRAME, onEnterFrame);


Play an embedded sound in AS3

Task: You need to play a sound contained within your content and set its volume.
Solution: Use the Sound, SoundChannel, and SoundTransform classes to play and
manipulate sounds.

function onSoundComplete(event:Event):void
{
trace("sound is completed");
}
var my_sound:Sound = new beep_id();
var sTransform:SoundTransform = new SoundTransform();
sTransform.volume = .5;
var channel:SoundChannel = my_sound.play();
channel.soundTransform = sTransform;
channel.addEventListener(Event.SOUND_COMPLETE, onSoundComplete);
Setting the class name for an embedded
sound for ActionScript 3

Dynamically load and display an image in AS3

Task: You need to dynamically load and display an image.

var request:URLRequest = new URLRequest("image.png");
var loader:Loader = new Loader();
loader.load(request);
loader.x = 100;
loader.y = 100;
loader.rotation = 20;
loader.alpha = .5;
addChild(loader);

Dynamically load and play a sound in AS3

Task: You need to dynamically load and play an MP3 file.

var url = new URLRequest("sound.mp3");
var sound = new Sound();
sound.load(url);
sound.play();

Load and read XML in AS3

Task: You need to load and read an XML file.

onXMLLoad(event:Event):void
{
var xml:XML = new XML(event.target.data);
trace(xml);
trace("Number of Contacts : " + xml..person.length());
trace("First contact’s favorite food : " + xml.contacts.person[0].favoriteFood);
}
var loader:URLLoader = new URLLoader();
var url:URLRequest = new URLRequest("contacts.xml");
loader.addEventListener(Event.COMPLETE, onXMLLoad);
loader.load(url);

Note: examples, use the following XML contained in a file called contacts.xml:

<xml>
<contacts>
<person>
<name>Mike Chambers</name>
<favoriteFood>Bacon</favoriteFood>
</person>
<person>
<name>John Doe</name>
<favoriteFood>Pez</favoriteFood>
</person>
</contacts>
</xml>


Sunday, October 11, 2009

Flash + CMS webside

This is another website that we created on flash with CMS....

Thursday, October 1, 2009

Attach a Background Music and handling its events

without a background music a flash website is incomplete so this is the script to handle the background sound in a flash and we can also use multiple music also....


var bgSound:Sound = new Sound();
bgSsound.loadSound("music.mp3", true);
this.play_mc.onRelease = function() {
var numSecondsOffset:Number = (bgSound.position/1000);
bgSound.start(numSecondsOffset);
};
this.stop_mc.onRelease = function() {
stopAllSounds();
};

Tuesday, September 29, 2009

Cache Problem with IE

this problem is mostly found with IE, while we update the XML file, the flash file still remains the same , due to cache, thus to solve this problem we can use math.random method, and it really works, i tried this a million times.

myXML.load("update.xml?" + Math.random());

Wednesday, September 23, 2009

Add Style Sheet to Dynamic Text

sample css for dynamic text

.bodyCopy
{
font-family: Arial;
font-size: 12px;
color: #666666;
line-height: 28px;
}

ActionScript

var format = new TextField.StyleSheet();
var path = "main_styles.css";

format.load(path);
format.onLoad = function(success) {
if (success) {
output.styleSheet = format;
} else{
trace("style sheet not loaded")
}
}

Wednesday, September 16, 2009

Flash ActionScript 2.0 Dynamic Vertical Menu

we all know about XML and its uses over Internet. Now a days, requirements comes mostly for dynamically created flash , i mean to say xml embeded flash file. As for now I am going to show how to create such files. In my example I would show how to create menu item dynamically, embeding XML with flash. So lets start....

1) First we need to create a XML file maintaining this following formate, you can know more about XML from this link http://www.w3schools.com/xml/default.asp . My XML file should look like this.


2) Open Flash proffesional 8 or upperversion, create a new file, save the file with the XML file you got.

3) Create a rectangel , width:120, and height:20, and then convert it into movieclip and name it as "menuitem"

4) Double click on this particular movieclip and create a new layer, go to the first frame of the new layer and then create a dynamic text field and give it an instance name "name"

5) Come over to the stage and press CTLR + L or you can go to windows>library. you can find the movieclip named menuitem there, right click over the movieclip, chose properties, there yon find Linkage option.

Check for Export for Actionscript, the name for Identifier and Export for first frame will get filled, dont change them, keep it as it is. Press ok and then come to the stage. you can find the menuitem movieclip, remove it from the stage.

6) Select the frist frame and press F9, the action panel will open up. From here on we continue with the actionscript 2.0. Generates a list of menu items , given the inputted parameters. This makes the main menu.

Loading and Interpreting XML

xmlNode = xmlObject.firstChild;
for (var i = 0; i <>
xmlNode.childNodes[i].nodeName;
xmlNode.childNodes[i].attributes.name;
xmlNode.childNodes[i].attributes.action;
xmlNode.childNodes[i].attributes.variables;
}

Get XML

menu_xml = new XML();
menu_xml.ignoreWhite = true;
menu_xml.onLoad = function(ok){
if (ok){
Createmainmenu(10, 10, 0, this);
}
};
menu_xml.load("myXMLfile.xml");

Generating Menu

if (node_xml.childNodes[i].nodeName == "menu"){
curr_item.node_xml = curr_node;
curr_item.onRollOver = curr_item.onDragOver = function(){
var x = this._x + this._width - 5;
var y = this._y + 5;
GenerateMenu(curr_menu, "submenu_mc", x, y, 1000, this.node_xml);
};
}else{
curr_item.arrow._visible = false;
curr_item.onRollOver = curr_item.onDragOver = function(){
curr_menu.submenu_mc.removeMovieClip();
};
}

Action

Actions = Object();
Actions.gotoURL = function(urlVar){
getURL(urlVar, "_self");
};

At the End the Script will look like this

GenerateMenu = function(container, name, x, y, depth, node_xml) {
var curr_node;
var curr_item;
var curr_menu = container.createEmptyMovieClip(name, depth);
for (var i=0; i<4;>
curr_item = curr_menu.attachMovie("menuitem","item"+i+"_mc", i);
curr_item._x = x;
curr_item._y = y + i*curr_item._height;
curr_item.trackAsMenu = true;
curr_node = node_xml.childNodes[i];
curr_item.action = curr_node.attributes.action;
curr_item.variables = curr_node.attributes.variables;
curr_item.name.text = curr_node.attributes.name;
curr_item.onRollOut = curr_item.onDragOut = function(){
var col = new Color(this.background);
col.setTransform({ra:100,rb:0,ga:100,gb:0,ba:100,bb:0});
};
curr_item.onRelease = function(){
Actions[this.action](this.variables);
CloseSubmenus();
};
}
};

Createmainmenu = function(x, y, depth, menu_xml){
GenerateMenu(this, "mainmenu_mc", x, y, depth, menu_xml.firstChild);
mainmenu_mc.onMouseUp = function(){
if (mainmenu_mc.submenu_mc && !mainmenu_mc.hitTest(_root._xmouse, _root._ymouse, true)){
CloseSubmenus();
}
};
};
CloseSubmenus = function(){
mainmenu_mc.submenu_mc.removeMovieClip();
};

Actions = Object();
Actions.gotoURL = function(urlVar){
getURL(urlVar, "_self");
};
Actions.newMenu = function(menuxml){
myXMLfile_xml.load(menuxml);
};

myXMLfile_xml = new XML();
myXMLfile_xml.ignoreWhite = true;
myXMLfile_xml.onLoad = function(ok){
if (ok){
Createmainmenu(10, 10, 0, this);
trace( "message area");
}else{
trace("error: XML not successfully loaded");
}
};
myXMLfile_xml.load("myXMLfile.xml");

Flash ActionScript setInterval

Many a times we feel the need to set time intervel between frams so this is an example of it. Lets get started.

1) first we take a variable displayTime and that will be = to the duration

var displayTime = 5;

in here 5 is for 5 seconds hold, if you want then you can increase or decrease the time as you want.

2) Its time for us to create the function
so the name of the function is countDown

var displayTime = 5;
countDown=function(){

}

3) Next is to verify weather the function get loaded sucessfully and display the message after 5 sec.

var displayTime = 5;
countDown=function(message){

}

4) we create a loop function now so that the function starts countion reverse as for ex 5sec, 4sec, 3sec, 2sec, 1sec, and finally go

var displayTime = 5;
countDown=function(message){
displayTime--;
}

5) how would the function know weather it has finished counting or not , thus its time for condition.

var displayTime = 5;
countDown = function(message)
{
displayTime--;
if (displayTime == 0){

}
}

6) finallly you need to stop the loop function or else it would continue the loop function and you get confused, we use clearInterval to end the timer.

var displayTime = 5;
countDown = function(message)
{
displayTime--;
if (displayTime == 0){
clearInterval(timer);
trace("this action you need to paste here")
}
}
timer = setInterval(countDown, 1000);

the whole script would look like this

var displayTime = 5;
countDown = function(message)
{
displayTime--;
if (displayTime == 0){
clearInterval(timer);
trace("this action you need to paste here")
}
}
timer = setInterval(countDown, 1000);

Saturday, September 5, 2009

Web 2.0 Format layout

if you click on the image you can visit the website and then if you have a look on the source code then you wount find any table used to create this website as because it was made in compleate web 2.0 formate and the design is managed from css file.
A sample of compleat table less website.

Wednesday, August 12, 2009

Flickr

This is a test post from flickr, a fancy photo sharing thing.

Thursday, July 9, 2009

My Character Design


Graphics


  • There is a total of 14 character


    • 7 avatar images of the military units (100x100 pixels, only upper body) to be used during the formation phase and in the “Army Composer”

    • 7 in-game graphics (full body) of all these military units as they are represented on the battlefield (maybe roughly 40x60 pixels)

    • Each of the 7 in-game graphic must have 3 associated animations

      • Normal movement from field to field

      • Attack motion (e.g. shooting an arrow, attacking with a sword etc.)

      • Defense motion


  • The in-game graphics should be flat-shaded vector graphics with little emphasis on their organic shape. In this way the units are easily identifiable on the battlefield.

  • The avatar images should be more sophisticated vector or pixel graphics

  • ALL graphics mentioned should not look playful or funny, but rather grim and ferocious.

  • In addition, the military units should cast faint shadows onto the fields they are placed within in order provide a little bit more 3D illusion. It is enough to make short contact shadows at the unit’s
    bottom side. No need to make a full length shadow of the entire unit’s body!


Character Name: Rifleman
Weapon: Musket


Character Name: Swordsman
Weapon: Sword


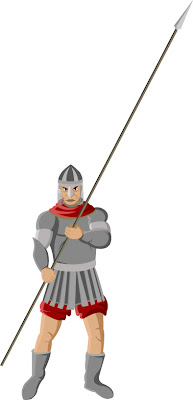
Character Name: Pikeman
Weapon: Pike


Character Name: Vomitting Troll
Weapon: ####


Character Name: Giant
Weapon: ####


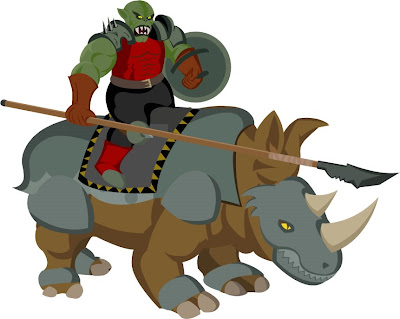
Character Name: Rhino Rider
Weapon: Lance


Character Name: Goblin Jumpa
Weapon: Sword; Jumping


Character Name: Orc Warrior
Weapon: Sword


Character Name: Suicide Goblin
Weapon: Suicide Attack


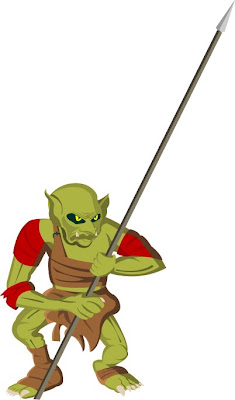
Character Name: Goblin
Weapon: Pike


Character Name: Mortar
War Machine


Character Name: Organ Gun
War Machine


Character Name: Great Canon
War Machine


Character Name: Heavy Cavalry
Weapon: Lance


Friday, June 26, 2009

Character Animation

Orc Animation : this is one of the animated character that would be placed in the game, this particular animation made in flash , 45 degree top view ...


Pickman Animation


Rifleman Animation


Swordsman Animation


Heavy Cavalry Animation

Thursday, June 11, 2009

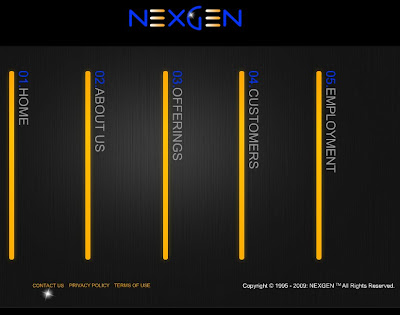
Dynamic NEXGEN Site with JOOMLA CMS


The requirement was to convert the existing NEXGEN website to a dynamic flash website that reads all content from a MySQL database maintained using the FREE Open Source content management systems JOOMLA and any of its FREE Open Source Extensions. Enable the New NEXGEN website Content (text & images) to be maintained and updated using the Free Open Source Content Management System (Joomla)